Configuring ScanDisk and Defrag in Microsoft™ Windows *95 and* 98
[From Karl Sirgedas, Microsoft, Ziff-Davis and Neshaminy School District of Pa. 5/30/00]
Revised 6/5/03

ScanDisk
As you probably know, hard disks can and do go bad. Fortunately, Windows™ 98 comes with ScanDisk, a full-featured disk analysis and repair utility. With regular use, ScanDisk can locate small problems on your hard disk and fix them before they turn into bigger problems. ScanDisk detects and repairs a number of problems on your hard disk, including the following:
- FAT (file allocation table) errors
- Illegal names, dates, and times
- File system structure problems, such as lost clusters and cross-linked files
- Directory tree errors
- Defects on the disk itself, such as bad tracks
The two most common of these problems are lost clusters and cross-linked files. A cluster is the smallest unit of hard drive space that can be assigned to a file. A lost cluster is one that isn't associated with a file and is therefore useless. When Windows 98 attempts to piece together all the clusters that make up a file, it sometimes scrambles, or cross-links, two files. Fortunately, ScanDisk can usually fix both of these problems.
Configuring your level of protection
Once you arrive at the ScanDisk For Errors page, Figure D, you're ready to configure how you want ScanDisk to work.
|
![[ Figure D ]](scan_defrag_files/w989936d.gif) |
| Figure D: You'll configure how you want
ScanDisk to work from the ScanDisk dialog box. |
|
Select The Drive(s) You Want To Check For Errors in the list box, ScanDisk automatically selects all the hard disks in your system. You then have the option of changing the default test type from Standard to Thorough.
When the Standard option is selected, ScanDisk will check only the file system structure, including the FAT, directory entries, long filenames, and other items related to the file system. However, if you select the Thorough option, ScanDisk will perform a surface analysis of the physical disk in addition to the standard detection and repair. The Standard test takes only a few minutes to perform, while the Thorough test can take considerably longer.
We!!! recommend that you select/run in Standard Mode @ least once a week and the Thorough option to run at least every 2 weeks or Month*or MORE* to ensure peak performance.
 *FOR STD. or Thor. = Check* Automatically Fix Errors = normally for C drive. (especially for a Scheduled Task)
*UNcheck for Floppies, Zip or Superdisks* This allows you to determine how Scan Disk fixes the problem and makes you aware of what problem Scan Disk encountered.
Always Scan Disk a NEW Floppy, etc, just to be safe!
Scan Disk: *Advance Tab Summary*
This Windows 95/98 Utility is used for Both Standard and Thorough:
This utility checks the files and folders for logical errors on your hard disk such as Lost File Fragments, Cross-linked Files, Invalid File Dates. Although Lost File Fragments can contain useful data, they usually can not be recovered and take up disk space. When prompted by the application delete these files and recover disk space. To run Scan Disk:
Click START > PROGRAMS > ACCESSORIES > SYSTEM TOOLS > SCAN DISK
Setup the following options under the *ADVANCED TAB* in Scan Disk:
![[ Figure F ]](scan_defrag_files/w989936f.gif)
Display Summary - *ONLY IF ERRORS FOUND*
Log File - *REPLACE LOG*
Cross-linked Files - *Make Copies*
Lost File Fragments - *CONVERT*
Check Files For - *INVALID FILE NAMES*
Check Files For - *INVALID DATES AND TIMES* NOT Shown!
Click Check *Host Drives First*
Setting the advanced options
The advanced options provide you with some important controls. As such, let's take a close look at each of the groups of options here.
Display Summary
The three options in the Display Summary panel control whether ScanDisk displays a summary dialog box after it finishes the scan. If you have an older hard disk and want to keep a close eye on its health, you might want to select the Always option. On the other hand, if you have a brand-new hard disk, which you know is in pristine shape, you might select the Never option. However, regardless of your hard disk's age, we recommend that you leave the default option- Only If Errors Found--selected.
Log File
The three options in the Log File panel control the way ScanDisk logs detection and repair information. If you configure ScanDisk to create a log, the utility generates the file Scandisk.log in the root directory of the disk it checks. This log contains a report of the errors ScanDisk found and how they were corrected. We recommend that you *Replace* a Log File, as it can help you determine what to do with any files that ScanDisk recovers, ONLY before Next Scan replaces it:
Cross-linked Files
The options in the Cross-linked Files panel determine how ScanDisk handles any cross-linked files it detects. If you decide to let ScanDisk correct the cross-linked files, your best option usually is the default--Make Copies. By making separate copies of the cross-linked cluster for each file and retaining the files, you can recover at least one of the files. To aid you in the recovery process, you can use the information in the log file Scandisk.log. Valid until next scan.
Lost File Fragments
You use the options in the Lost File Fragments panel to tell ScanDisk how to treat lost cluster chains. When a cluster is "lost," it isn't marked in the FAT as being available. By default, ScanDisk will recover lost clusters and convert them into files. Converting the lost cluster chains to files is useful because doing so will make it easy to recover a file that was accidentally lost because of disk errors. We recommend that you leave the Convert To Files option selected to ensure maximum protection for your data. Again, you can check the log file Scandisk.log for more information on these files.
Check Files For
The options in the Check Files For panel let you specify some additional types of errors for which you want ScanDisk to search. By default, the Invalid File Names checked box is selected. This is important because you may not be able to open files that have invalid names.
The Invalid Dates And Times checked box allows you to configure ScanDisk to check for invalid dates and times. This is important because files with an invalid date or time stamp will not be sorted properly in My Computer or Windows Explorer. Furthermore, a file with an invalid date or time stamp may not be properly recognized by backup or copy operations. If so, the file could be overwritten.
If you select the Duplicate Names check box, you'll see the warning dialog box shown in Figure G.
|
![[ Figure G ]](scan_defrag_files/w989936g.gif) |
| Figure G: This warning dialog box alerts you that this option can take a long time to process.
|
This option configures ScanDisk to locate files with duplicate names and compile a report of those files and their locations in the log file Scandisk.log.
The miscellaneous options
In the miscellaneous category, you have two options. The Check Host Drive First option tells ScanDisk to check the host drive of a DriveSpace compressed volume before checking the integrity of the compressed volume. If you aren't using DriveSpace, clear this check box. If you're using DriveSpace, you'll disable this option only if you just finished checking and repairing the host disk and only wanted to check the compressed disk.
As you may know, Windows 98 saves files with both long and short filenames. The short filename, which uses the 8.3 format, allows older applications that don't recognize the long filename format to be able to open and save files. This short filename is called the MS-DOS™ name. The Report MS-DOS Mode Name Length Errors option will configure ScanDisk to seek out files with corrupt MS-DOS names.
Once you've finished setting the advanced options, click OK. When you do, you'll return to the Settings For ScanDisk dialog box.
Setting the Thorough scan options
Thorough Mode: Scan Disk
performs the Standard tests and checks the surface of the hard drive for errors. This should be done at least once a month.
When you select the Thorough, the Options button to the right becomes active.
You can then click this button to display the Surface Scan Options dialog box, shown in Figure E.
From here, you're able to configure in more detail how you want ScanDisk to work.
![[ Figure E ]](scan_defrag_files/w989936e.gif) |
| Figure E: The Surface Scan Options dialog box lets you specify options for a thorough scan.
|
The options in the Areas Of The Disk To Scan panel let you select the area of the disk you want ScanDisk to search for defects. You can tell ScanDisk to scan the system area, the data area, or both. We recommend that you leave the default option--System And Data Areas--selected.
Just below the Areas Of The Disk To Scan panel you'll see the Do Not Perform Write-testing check box, which lets you determine whether ScanDisk will perform an intensive scan of every disk sector. If you select this check box, ScanDisk will only read the sector data and won't rewrite the data. Of course, this doesn't perform as thorough of a test, but it will reduce the amount of time the operation takes to perform. We recommend that you leave this check box cleared, so that ScanDisk will read and write each sector of the disk to completely check its integrity.
The last check box, Do Not Repair Bad Sectors In Hidden And System Files, lets you determine whether ScanDisk will conduct another time-consuming maintenance chore. By default, ScanDisk repairs bad sectors in hidden and system files by writing these sectors to a new location. Again, we recommend that you leave this check box cleared, so that you're getting the most protection possible.
On the other hand, there are some older applications that require sectors of their hidden and system files to be in a specific location on the hard disk. Moving these files may prevent the application from running. Selecting this check box prevents ScanDisk from relocating the bad sectors of hidden and system files to new positions. Once you're done setting the surface scan options, click OK to return to the Scheduled Settings For ScanDisk dialog box.
Disk Defragmenter
Disk Defragmenter: This Windows 95/98 Utility can significantly improve disk performance by restructuring the data on the drive in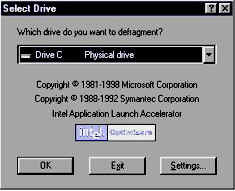 contiguous blocks and moving free space to the end of the drive, which allows for faster data access. The more you use your computer the more data can become fragmented across your drive slowing the computers operation considerably. Defragmenting a hard disk can take a long time. Although you can continue working you will notice a significant slowdown in your computers operation. For this reason, it is advisable to run Disk Defragmenter during a time you do not need to use the computer.
To run Disk Defragmenter Click
START > PROGRAMS > ACCESSORIES > SYSTEM TOOLS > DISK DEFRAGMENTER
The select drive dialog box appears. Select the drive from the drop down list and
choose OK
The Disk Defragmenter dialog box will display the percent of fragmentation of the selected drive and whether defragmentation will improve performance
To change Disk Defragmenter options choose the Settings tab and select from the following:
Full Defragmentation, Win95; OR Rearrange Progam Files so my programs start faster, Win 98: (both files and free space) Defragments all the files on the selected drive and moves the free space to the end of the drive. This provides the greatest improvement in performance, But take the Longest:
Defragment Files Only, Win95: As the option implies, only files will be defragmented without consolidating free space. This takes less time than Full Defragmentation.
Consolidate Free Space, Win95: This option is good when loading new programs.
Check Drive for Errors: A good idea only if you haven't run Scan Disk recently
This Time Only, Next Time, Use the Defaults: Uses the selected options for this defragment operation only.
Save These Options and Use Every Time: Saves the selected options and uses them each time you run Disk Defragmenter unless you change them again.
DO NOT Defrag Floppies, Zip's or SuperDisks !
FOR Windows 98:
U can
SCHEDULE
Scan Disk and Defrag. by using the Maintenance Wizard,
by selecting from
Programs/Accessories/System Tools/Maintenance Wizard. Once the Maintenance Wizard's initial dialog box appears, select the Change My Maintenance Settings Or Schedule a Option and Then select Customize; Also See - OUR PC Care Basics 6/2000
also.....See MY
Hard Drive and ScanDisk n Defrag [2] Tips
[for Microsoft™ Win 98/ME/XP [Home and Pro]]
http://pg13_funnys.tripod.com/c_tech/top/harddrive_scan_defrag2_603.htm
Karl Sirgedas
revised 6/10/2003
Karls Computer Tips
http://pg13_funnys.tripod.com/c_tech/index_ct.html